Showing posts with label asian. Show all posts

Friday, January 20, 2012

Asian Chicken

I used to make this all the time in college for a quick and easy dinner.  I love dark meat chicken, but you're welcome to use whatever kind you life.  You could even buy family-size packs, marinate the whole lot, and throw in just a few pieces into individual freezer bags.  Once you freeze it, you can defrost at your leisure throughout the month.


Asian Marinated Chicken

:: 2 pounds chicken (I used whole legs, whatever cut works)
:: 1/2 cup honey or sugar
:: 3/4 cup soy sauce
:: 3/4 cup water
:: 8 cloves garlic, smashed or minced
:: 3 scallions, cut into 1-in pieces
:: 1-inch chunk of ginger, cut into thin discs
:: 1 tbsp rice wine vinegar
:: hot sauce to taste, or 1 jalapeno, sliced thinly
:: 1 tsp sesame oil

Mix everything together except for the chicken.  If you are using skinless chicken, marinate for about 6 hours.  If you are using skin-on chicken, marinate overnight.  In retrospect, I probably would have poked a few holes in the skin to let the marinade really penetrate.

When you're ready to eat, pre-heat the oven to 350 degrees.  Lay the chicken skin-side down in a baking pan, pour marinade over chicken.  Bake for 25 minutes, turn heat up to 375, and flip chicken over.  Bake an additional 25 minutes.** 

Remove chicken from oven and let rest for 5 minutes before serving.  If you'd like a thicker sauce at this point, pour excess marinade from roasting pan into a small saucepan over medium heat.  Meanwhile, combine 1 tbsp corn starch with 1 tbsp COLD water into a slurry.  Stream the corn starch slurry into the chicken marinade, stirring the whole time until sauce thickens.

I served this with white rice and broccoli!

** for crispier skin, bake at 350 for 25 minutes, 375 for 20 minutes, and broil on low for the last 5 minutes of cooking time.

Sunday, December 11, 2011

Pad Ka Pow (Spicy Basil Stir Fry)

My big sis challenged me to make this dish, and so here we are!  Pad Ka Pow is not only fun to say, it's also fragrant from a ton of basil but also satisfying from all the other vegetables and meat. 

I apologize in advance....it was late, I was hungry, and I made this but ate all of it before I could take pictures of it.  Eek! I'm sorry, but when I make it again next I'll be sure to add the pictures in!

Tips for stir fry in general:

1) Get your wok or whatever pan you're using SCREAMING hot. 
2) Have your mise en place prepared in advance and close at hand.
3) Cook in small batches (ideally 1 portion at a time)
4) Don't be afraid of using a little oil.

Chicken Pad Ka Pow
(serves 4-6)

:: vegetable oil
:: 4 cloves garlic, minced
:: 2 shallots, minced
:: 1 pound chicken, minced or ground
:: thai chiles, sliced lengthwise (to taste)
:: 1 onion, sliced
:: 1 bell pepper, sliced
:: 1/2 pound mushrooms, sliced
:: other vegetable ideas - bamboo shoots, baby corn, eggpplant, etc.
:: 1 cup thai basil leaves
:: ka pow sauce (directions below)

You will probably cook this quantity in 2-3 batches.

Over high heat, pour some oil into the wok, about 1 tablespoon.  Add in a portion of the garlic, shallots, and thai chiles (I use 1 chile per 1/3 pound of meat for a bit of a bite) stir fry briefly, about 15-20 seconds or until fragrant.  Add in chicken and stir fry until meat is no longer pink. Push meat to sides of wok.

Add another tablespoon of oil to center of wok if necessary.  Add vegetables except for basil and stir fry for another minute.  Add a big handful of basil and about a tablespoon of sauce.  If it starts to look too dry, you can add in tablespoon or so of water, but too much sauce will make the stir fry too salty.

Serve with rice.

 
Ka Pow Sauce
:: 1 tbsp oyster sauce
:: 2 tbsp fish sauce
:: 1 tsp sugar
:: 1 tbsp (or to taste) sambal chili paste or chili garlic sauce


Stir to combine. 

Sunday, October 23, 2011

Carrot and Daikon Pickle (Do chua)

Ever since I worked at Lemongrass in college, I've had a love affair with this stuff.  Zesty, cool, refreshing, sweet and tangy, it goes wonderfully with a lot of things (including vermicelli noodle bowls, salads, banh mi... I'd even eat it on the side with some pho or pad thai).  It doesn't require any cooking and keeps in the fridge for probably even longer than a month, so you might as well make a big ol' batch of it.


Carrot and Daikon Pickle
adapted from Andrea Nguyen's Into the Vietnamese Kitchen

:: 3 small carrots
:: 1 pound daikon radish
:: 1 tsp salt
:: 2 tbsp sugar

brine
:: 1/2 cup sugar
:: 1 1/4 cup white vinegar
:: 1 cup water


Mix the carrots and radish with salt and 2 tbsp sugar.  This will draw some of the water out of the vegetables.  Stir, or get down and dirty using your hands to knead the vegetables!!  In 10-15 minutes, or after the vegetables have lost about 1/4 of their water, rinse in cold water and squeeze excess water off of the vegetables.

Meanwhile, make the brine by mixing the 3 ingredients together and letting the sugar dissolve.

Pour the brine over the carrot and radish.  Let brine for at least 1 hour.  Pickle will be good for up to 4 weeks.

Friday, September 9, 2011

Cold Sesame Noodles

Growing up, one of my favorite summer lunches was cold sesame noodles.  My parents were never big believers of air conditioning (or heat in the wintertime, for that matter...) so a cool noodle dish was always a nice treat to have.  The only cooking involved is for the noodles, the rest is just mixed up in a bowl, ready to eat!

Cold Sesame Noodles
(serves 6-8)

:: 1 box long pasta (soba, spaghetti, egg noodles...NOT chinese wheat noodles; these will fall apart)
:: 1 cucumber, julienned (cut into long thin strips)
:: 2 scallions, thinly sliced (I wish I had these on hand, but didn't!)
:: handful chopped cilantro (optional)
:: 2 tsp white sesame seeds (optional)

Tuesday, May 31, 2011

Larb (Thai chicken salad) with Lettuce Wraps


This recipe is dedicated to my good friend Laura. I visited her over the memorial day weekend, and failed to deliver larb from Lemongrass (our old place of employment), so am compensating by trying to recreate the dish for her. And then eat it for her. I guess no where in this scenario does she actually get to eat the larb. Opps.

Larb is a meat salad (chicken, pork, beef, turkey, etc.) that is very popular in Laos and parts of Thailand. I had never heard of it or tried it before waiting tables at Lemongrass. It sounds weird and not really very appetizing, but if you're anything like me and like spiciness and tanginess, you might appreciate this. During the summer, I try to "cook" as little as possible because of how darn hot it gets, so these salads are the way to go! I made mine with chicken, you can feel free to experiment on your own. I guess traditionally, the meat is minced, but I went with the ground version.

Dressing

:: 1/4 cup fish sauce
:: 1/2 cup lime juice
:: 1 tbsp sugar, or to taste
:: chili paste or chili garlic sauce to taste (I used 2 tsp)
:: 3/4 cup chicken broth
:: 1 1/2 pound ground chicken
:: 1 cup scallions, chopped
:: 3 tbsp chopped lemongrass
:: 1/2 cup cilantro, chopped
:: 1/3 cup mint, chopped

:: lettuce (romaine, butter, Boston) separated into leaves for wrapping

Mix the first 4 ingredients together until the sugar dissolves. Set aside.

Heat the chicken broth to boiling and cook the chicken, scallions, and lemongrass in it until the chicken is cooked through and most of the liquid has cooked off, about 10-15 minutes.

Remove from heat, toss in cilantro and mint.

Stir in sauce. Season with s&p if needed. Serve in lettuce cups!

Tuesday, May 24, 2011

Miso Dressing

I like miso for a lot of reasons.

1) It makes a delicious soup.
2) It makes a delicious marinade.
3) It makes a delicious dressing for salads.
4) It is deliciously salty.

Today, we're talking about Reason #3 to like miso. There won't be any pictures, because to be honest, it ends up looking like brown baby food with sesame seeds sprinkled in.

I guess there a ton of different types of miso (white miso, red miso...), each are made slightly differently from fermented rice, soybeans, and some other ingredients (tasty, huh?) that vary in color, taste, years aged, etc.

It typically comes in a refrigerated tub that ought to last you a good while. Since it's so salty, there isn't a huge hurry to eat it all up, although it might be so good that shelf life isn't even an issue. I don't know enough to talk about the nuances of the types, all I can tell you is that I bought the cheapest variety in the store. It is a red miso, which according to my good friend Wikipedia is older and saltier than the white variety. Then again, Wikipedia also has this tidbit of information.

"Some, especially proponents of healthful eating, suggest that miso can help treat radiation sickness, citing cases in Japan and Russia where people have been fed miso after the Chernobyl nuclear disaster and the atomic bombings of Hiroshima and Nagasaki. Notably, Japanese doctor Shinichiro Akizuki, director of Saint Francis Hospital in Nagasaki during World War II, theorized that miso helps protect against radiation sickness."

I mean, maybe, but I don't suggest you go around tempting fate by eating miso covered plutonium rods or anything like that.

This dressing would be great on just a plain salad, but the one I made tonight was of corn, red onion, and cucumber. Had I used more foresight while shopping instead of just buying vegetables willy-nilly, maybe I would have purchased an avocado, which would have made this even yummier. I guess you could just throw this on top of a plain avocado....drool.

Ingredients:

:: 2 tbsp miso
:: 2 tbsp rice vinegar
:: 3 tbsp mirin (japanese sweet cooking wine)
:: 1-2 tbsp water, depending on how you would like the consistency of your dressing
:: a few drops of sesame seed oil
:: 1 chopped scallion (optional)
:: 1 tsp sesame seeds (optional)

Mix them all together...... enjoy the magic!

This recipe makes about 1/2 cup, too much for 1 person probably, but the rest will keep in the fridge for about a week or so. If you didn't want to spring for mirin, I guess you could add in a bit more water and vinegar, and then add 1-2 tsp of plain white sugar. I haven't tried it, but it might be close to the right taste. Or if you have cooking rice wine, that would probably work, too. I would definitely not use sherry, marsala, or any of the other more intensely flavored cooking wines, though.

Final thought: sriracha and miso dressing together. I'm just saying.

Tuesday, May 17, 2011

Pad Thai

Pad Thai is the quintessential Thai street food. It is tangy and sweet and salty and delicious. If you've never had it, you are missing out, and it's time to try it! I love pad thai with shrimp and tofu, but it's good no matter what protein you put in it, or even if there is none at all.

And please...don't call it "pad thigh".

(4-5 servings in my house, but it would probably feed 6-8 more reasonable people)

Ingredients:

Pad Thai sauce:

:: 1/2 cup water
:: 1/2 cup fish sauce
:: 1/2 cup white sugar
:: 1/2 cup lime juice
:: 3 tablespoons tamarind pulp

Stir Fry ingredients:

:: 1 package rice stick noodles. I prefer medium width, use whatever you like.
:: canola oil (or another high smoke point oil. I wouldn't recommend olive)
:: 6 cloves garlic
:: 4 eggs, beaten
:: 1 pound shrimp
:: 1 package extra firm tofu, chopped into 1/2 inch cubes and patted dry.
:: chili powder
:: chopped scallions (optional)
:: chopped peanuts (optional)
:: lime wedges (optional)

2 hours before cooking, soak the rice stick noodles in COLD water. You can cut them with scissors, as they are extremely long and unmanageable to stir fry as is from the store.

Pad Thai sauce

The leftover sauce will keep in the refrigerator for a little while if you don't finish using it the day of, but I would probably throw leftovers out in 1-2 weeks.

Heat the 5 ingredients (lime juice, fish sauce, sugar, water, tamarind pulp) over medium heat. You only need to cook it long enough to dissolve the sugar and break up the tamarind. You will need to strain the sauce, I just use a slotted spoon. Little specks of tamarind are fine, giant chunks are....unpalatable.

(At this point, one of my friends threw away her sauce because she said that it smelled terrible and she had obviously done something wrong. Fish sauce smells terrible. Hot fish sauce smells even worse. Somehow, though, the combination of these ingredients transforms into something delicious, even if it doesn't smell like roses. You're doin' it right, now keep going.)

Not pictured below: tamarind pulp. Oops, sorry. It is a dark brown sticky mess that is packaged into a dense rectangular shape. I literally cut off chunks with a knife, or take a hard spoon (don't laugh, I've actually bent spoon handles trying to dig out chunks) to take off the pieces I need. Tamarind pulp is probably not an optional ingredient for pad thai, but luckily it has never been hard to find in asian grocers. It is sour and sweet!

Set aside to use while you cook.

Stir Fry

Heat a large pan, or wok over medium high heat. You will pan fry the shrimp, eggs, and tofu separately so that they are 80% cooked by the time you start to stir fry the noodles. By all means, substitute the shrimp or tofu with anything or nothing else, but please, please at least keep the egg. It is just so good and pad thai without eggs is like...a burger without a patty. Or something equally dramatic.

Cook the tofu in 1 tablespoon of oil and 1 teaspoon garlic. Let them fry until they begin to turn golden brown. Set aside.

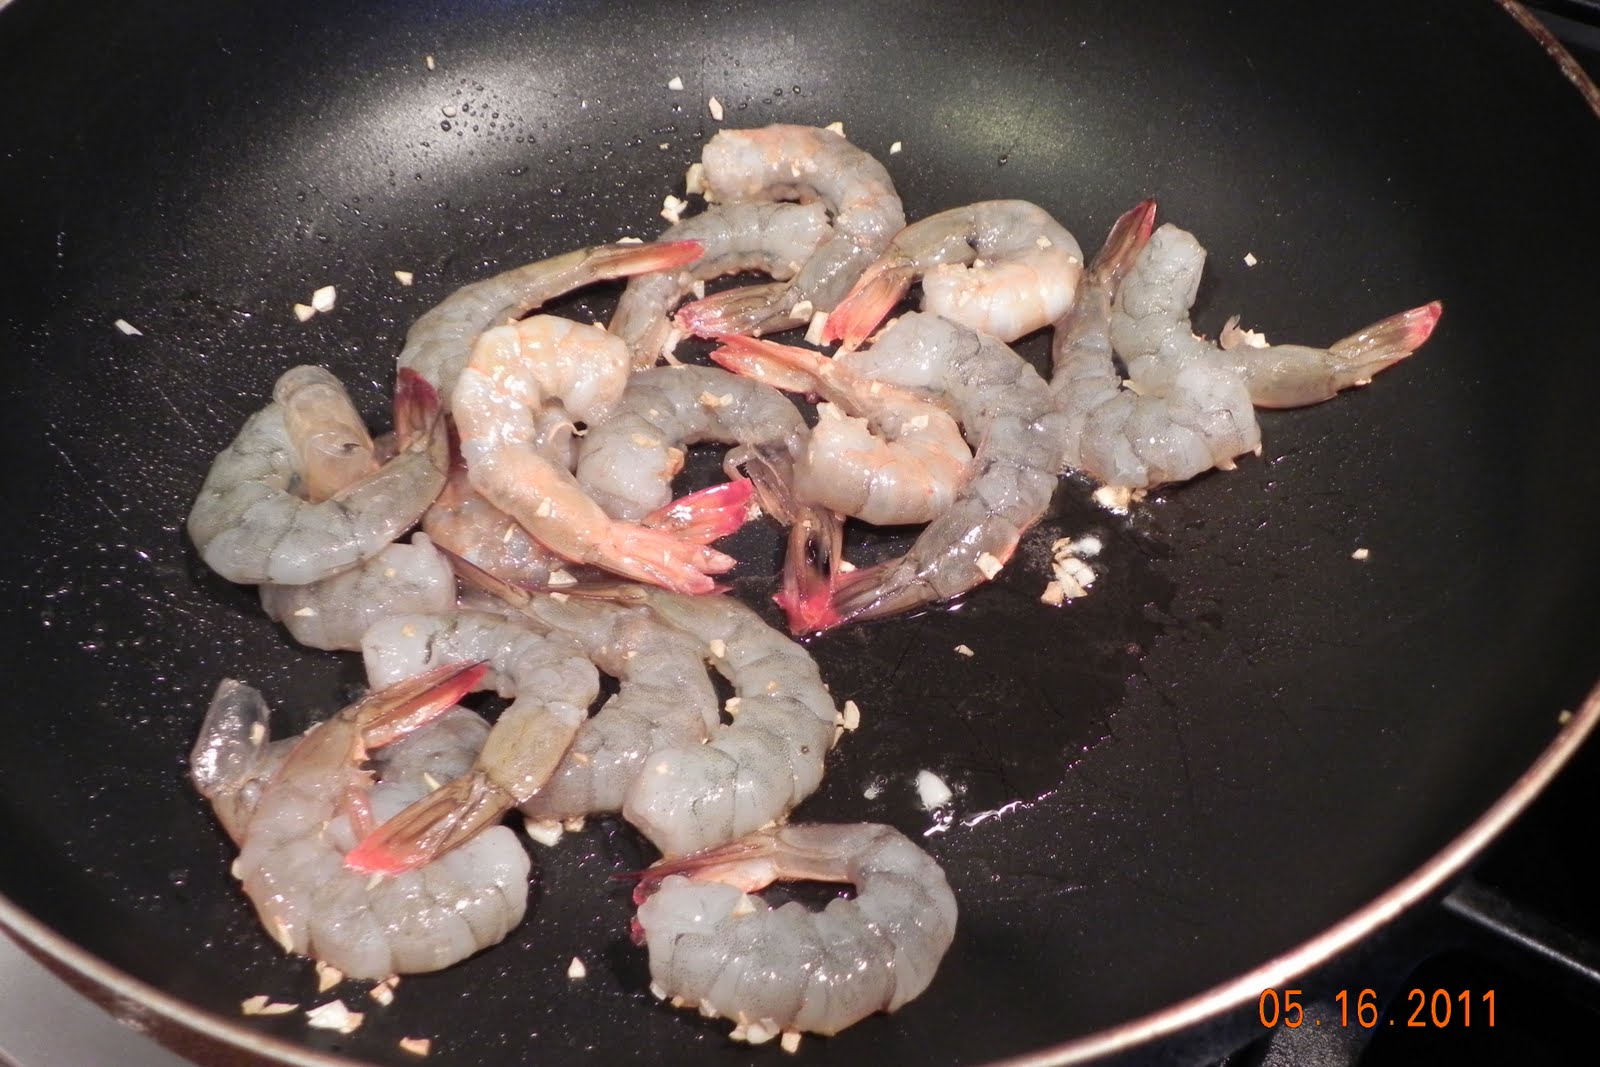
Cook the shrimp in 1 tablespoon of oil and 1 teaspoon garlic. Fry them 90 seconds on each side or until both sides are pink. Set aside.

Cook the eggs in 1 tablespoon of oil and 1 teaspoon garlic. Cook just until they are not runny, and look slightly shiny. Do not overcook! Set aside.

Drain the noodles. You MUST MUST MUST cook noodles in batches. With one package of noodles, I like to cook it in 3 batches.

Please trust me on this. T and I learned one hungry evening how essential this step was. We were too impatient to take the time for this extra step and ended up with a sticky, gunky mess of essentially...steamed noodles. While still good, it was such a waste of what would have otherwise been a wonderful meal.

Take 1/3 of the noodles and begin stir frying them over the highest heat your stove has with 2 tablespoons of oil and 1/3 of the remaining garlic. I know it probably sounds like we've used a ton of oil so far, but let's face it - pad thai is not low-cal dining. I use as little as I can get away with while still having a good end result.

Ladle in 1/5 of the sauce. Just eyeball it, you can be liberal, but like always, taste as you go along. Add in a teaspoon of chili powder. This really helps to make the color of the pad thai 'pop', and gives it that reddish orange hue we so love to see.

Stir fry this for a minute or two, until the noodles become less rigid and more pliable. Add in 1/3 of the shrimp, tofu, and egg. Since the proteins should more or less be cooked anyway, at this point we are just reheating them and making sure the noodles are well cooked.

Stir fry them until al dente, STOP before they become mushy! If you are convinced it is too dry, add a few drops of oil and water and keep going. Taste the noodles. Once they have a nice toothsome bite, stir in some scallions if desired and dump them out on a plate.

You can serve chopped peanuts, bean sprouts, scallions, and lime wedges on the side as garnish if you like!


Tom Yum Soup

I had my first encounter with tom yum when I worked at a Thai restaurant in college. I of course had to become acquainted with the menu, not that it was exactly a chore, and first tried the tom kha, a richer coconut-y version of tom yum. I much preferred to tom yum at the time. When I had some difficulty remembering which was which when customers ordered, I even started using the "tom yum is NOT the yummy soup!" mnemonic to help me remember.

I was wrong, of course. Tom yum is SO DELICIOUS. It is tangy, spicy, savory. The perfect appetizer soup because it is so fresh tasting and broth based, so you don't feel full by the time your main course arrives. It's not hard to make but the ingredients aren't your typical household staples.

(4-6 servings)

Ingredients:

:: 2 cups chicken or shrimp stock
:: 3 cups water
:: 2 lemongrass
:: 1 inch of galanga, cut into 3 disc shaped pieces
:: juice of 1 limes to taste
:: 4 tablespoons tom yum paste
:: 2-3 kaffir lime leaves
:: 1 tablespoon fish sauce
:: 1/2 package medium tofu, chopped into 1/2 inch cubes
:: 1 can straw mushrooms, rinsed and drained, cut in half lengthwise (to divide the cap)
-OR- substitute tofu, mushrooms for shrimp, chicken, or nothing at all.
:: thai red chiles to taste
:: cilantro for garnish

SIDEBAR: I made my own shrimp stock for the soup, but only because I didn't have any at home and had a lot of leftover shrimp shells that I never have the heart to throw away. These shells can be difficult to extract later on, so it's useful to have a cloth spice sack or something of that nature just to hold them in one place for easy extraction at the end of the stock making process. I boiled shells from 1 pound of shrimp along with an onion and carrot in 4 cups of water until the vegetables got super soft, at which point I removed the shrimp shells. I added about a cup of chicken stock just because that's what I had laying around the fridge, and went from there. I think that chicken stock would work just fine in this (low sodium, preferably!) but I rarely make the soup without making the pad thai, so I usually start from my own shrimp stock base. Understandably this is an extra pain in the butt, and otherwise I just use a 1:1 ratio of stock to water to begin the soup with. End sidebar.

Back to the soup...

And herein lies the beauty of most soups. You can make them way in advance. In this case, I made the broth after lunch and let it hang out on the stove for a while. Or the night before, or a few days before, whenever you have a chance.

When dinner was 30 minutes away, I combined all the ingredients except for the tofu and mushrooms. I added the lemongrass (the stick-y thing in the right middle of the picture), galanga (the brown ginger-like ingredient in the top right of the picture), the juice of one lime, 1 tablespoon of fish sauce, and 4 tablespoons of tom yum paste. I was hesitant to add in the chiles just yet in case I wasn't able to control the spice level and it got too out of hand.

If you'll notice, I have no kaffir lime leaves in the picture. Hard enough to find in normal circumstances, the store owner informed me that kaffir lime leaves are currently illegal to sell in supermarkets. I have no idea if this is true or not but he is probably a better authority on supermarket-able goods than I, so maybe you'll have better luck. It really is nice to have the leaves because they have a very un-substitutable fresh, tangy flavor, but just make do with what you have.

I have used tom yum paste in my recipe, which many recipes 'from scratch' do not use. The intensity of the flavors has been difficult to achieve if I do not use it, but I hope that adding in fresh ingredients of my own makes the soup taste like it is not prepackaged. I think it's delicious and doesn't suffer from having the paste added in (the paste itself is just a mixture of chiles, kaffir lime leaf, lemongrass, galanga, etc anyway, just in a more potent mixture).

The mushrooms I cut in half because 1) they're a little large for bite-size pieces and 2) my family pointed out to me that it makes the ingredients seem to stretch farther. I added those in with the bite-size tofu 5 minutes before dinner, just long enough to warm them through without getting soggy.

I'd like to take a moment to stress the importance of tasting as you cook. You may find that the ingredient portions I use are not suited to you, that you like your soup a little saltier, a little spicier, more vegetarian, whatever. This recipe was largely based on tasting and thinking "Hmm that could use more _____." Go with your gut! Usually you will be right...as long as you TASTE before you ADD.

Add some cilantro for garnish... serve with a giant soup spoon!